How to install Jupyter Notebook on Ubuntu
A Jupyter Notebook is an open-source web application that allows users to create and share documents that contain live code, equations, visualizations, and narrative text.
Jupyter notebooks are commonly used for data analysis, machine learning, scientific computing, and education. They enable users to create interactive and reproducible computational workflows that can be shared with others.
In this post, we will go through the Jupyter Notebook installation using apt the default Ubuntu package manager.
Install Python3 Jupyter kernel
Open the terminal and install the python3-notebook package:
sudo apt install python3-notebook -y
In your user home, create a directory for storing the notebooks:
mkdir ~/jupyter-workspace
Create a password for the notebook:
jupyter notebook password
Start the notebook server specifying the directory previously created:
jupyter notebook --notebook-dir=~/jupyter-workspace
Now the server is up and running.
Create your first notebook
Open the notebook web interface from the browser, and use the link: http://localhost:8888 to connect. Enter the password you have chosen previously:

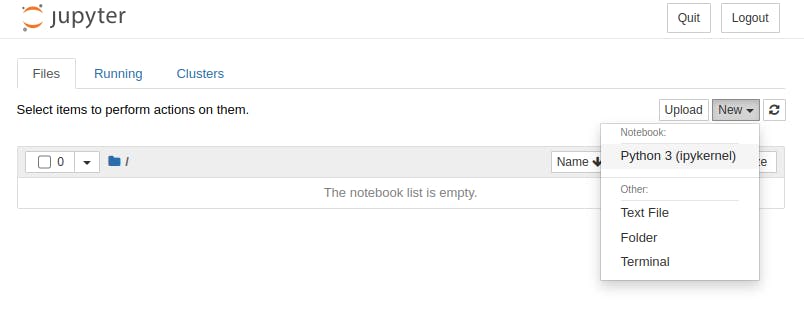
After logging in, look for the New button on the right of the menu and press it. From the dropdown menu press: Pyhton 3 (ipykernel).

You have just created a new Python notebook! Enter some Python code in the cell and press Ctrl + Enter to execute it!

You have just created your first Jupyter notebook!
Uninstall Jupyter Notebook
rm -rf ~/.jupyter
rm -rf ~/jupyter-workspace
sudo apt remove python3-notebook -y
sudo apt autoremove
Conclusions
In this guide, we have seen how to install a Jupyter Notebook on Ubuntu. We also created a simple notebook using the Python3 kernel.
Jupytern Notebook also supports other kernels here's how you can install them:
Install R kernel:
sudo apt install r-cran-irkernel
Install Octave kernel:
sudo apt install python3-octave-kernel