Creating custom AMI Images with AWS EC2 Image Builder


If you're familiar with AWS EC2 instances, you may already know about the optional "user data" field that allows you to provide a series of commands to be executed during instance startup. This is a convenient way to automate instance configuration, but what if there's a better way?
In today's post, we'll introduce you to AWS EC2 image builder, a service that enables you to create Amazon Machine Images (AMIs) with custom configurations. As an exercise, we'll walk through customizing an Amazon Linux image to include Docker and other utilities.
Before we get started, here are some key concepts to understand:
Components: These are sets of instructions needed to configure a specific service. Components are reusable and can be shared between Image recipes. They can be Amazon-managed or owned by you.
Image recipes: These are combinations of components needed to configure a custom AMI image. You specify the base image and the components to be applied on top.
Image pipelines: These are used to build custom AMI images using the procedure described in the Image recipe.
Creating a Component
First, open the AWS console and navigate to the EC2 Image Builder service. From the left menu, click Components, then click Create component.
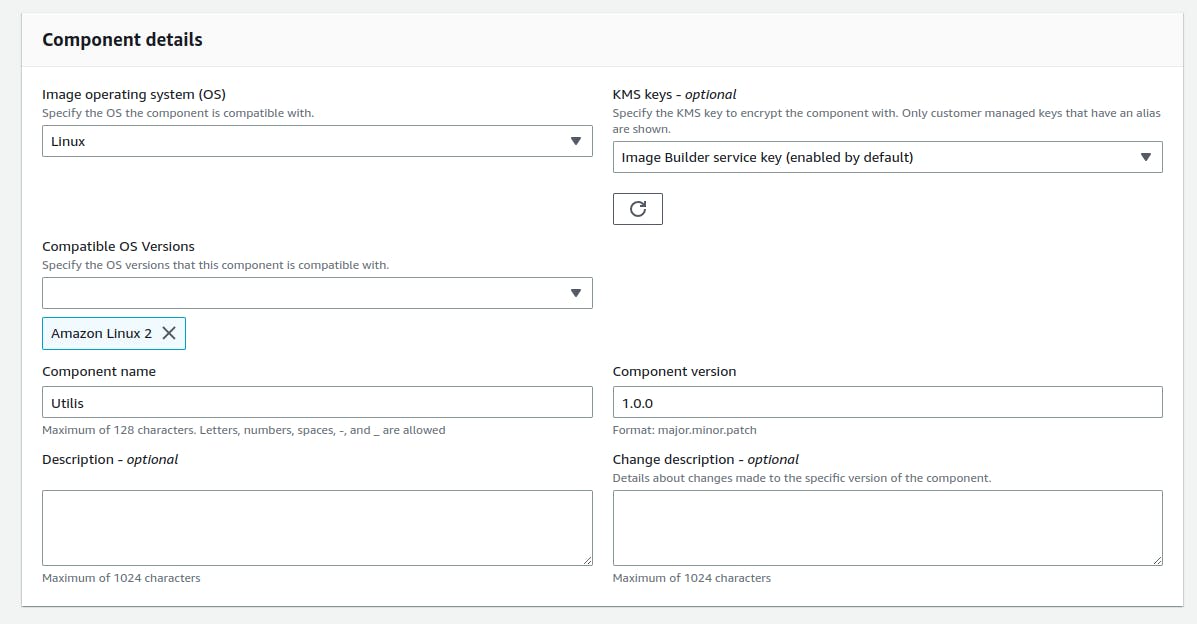
In the Component details section, make sure to:
Select Linux as OS.
Select
Amazon Linux 2from the Compatible OS Version drop menu.Set
Utilisas component name.Specify a component version.
It should look like this:
Next, move to the Content section, where you'll define the instructions. Copy and paste the following code:
name: Install common packages
description: Install common packages
schemaVersion: 1.0

phases:
  - name: build
    steps:
      - name: InstallWithYum
        action: ExecuteBash
        inputs:
          commands:
            - yum install vim htop git -y
As you can see, the component consists of one step where yum, the Red Hat package manager, installs vim, htop and git.
Click Create component to save.
Note: Although we set as Compatible OS Version only AWS Linux but the same instructions can also be executed on Red Hat-based OSes like CentOS. This is a great example of how a component can be reused and shared in different Image Recipes.
Creating an Image Recipe
From the EC2 image builder console, click Image recipes and then click Create image recipe.
In the Recipe details:
Set as name:
DockerEnabledImage.Set version:
1.0.0.
It should look like this:

In the base image section:
Select
Amazon Linuxas Image Operating System.Select
Amazon Linux 2 EC2 Optimized x86as Image name.
Setting up components
Next, we'll specify which components will be executed during the image creation. In the search bar, type docker and select Amazon-managed from the drop-down menu. Then, select docker-ce-linux.
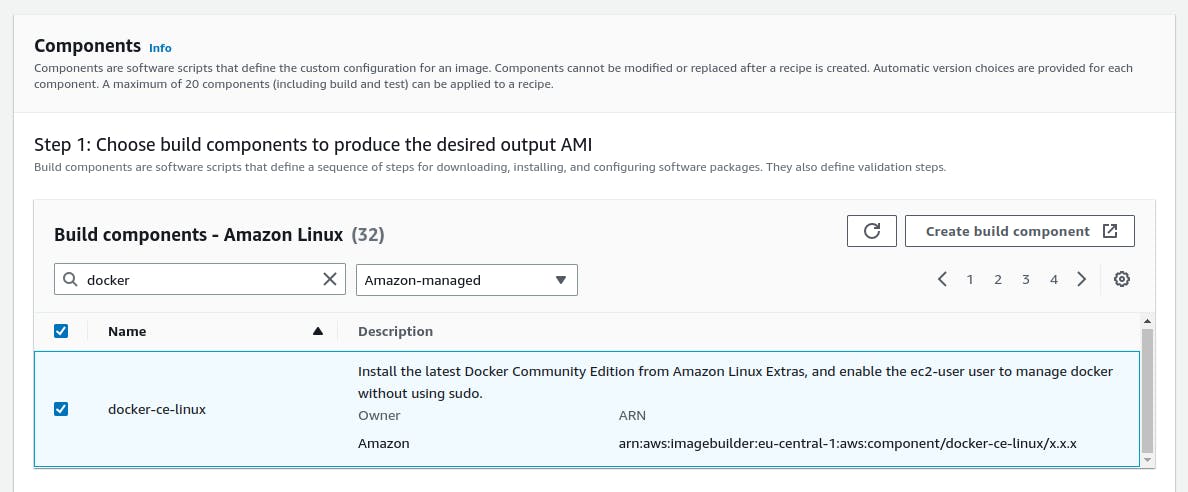
This component installs Docker Community Edition, enables the docker service at startup, and adds the "ec2-user" to the docker group to execute docker commands without typing sudo.
As the name suggests, Amazon-manged components are created and shared by AWS, so AWS is responsible for keeping them up to date. This means that the component will be updated in case of changes in the docker-ce installation.
Select Owned by me in the drop-down menu, the Utilis component you created previously will appear, tick it.
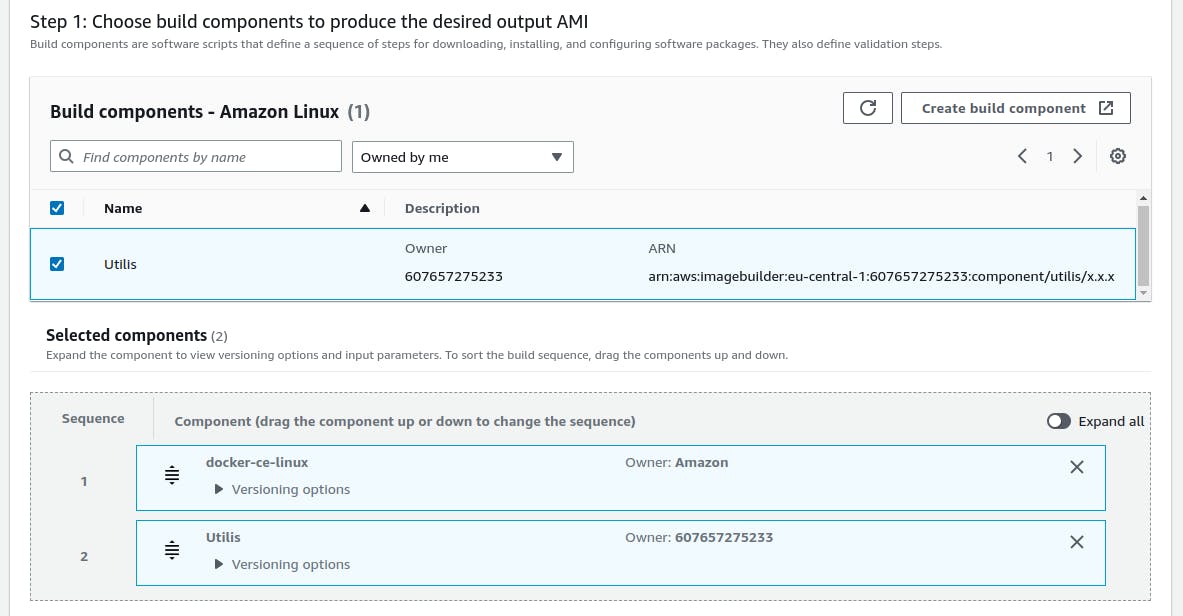
When more than one component is included in the recipe, you can set the execution order. This might be important if your roles have dependencies, for this recipe, there is no need to execute the components in a specific sequence.
Click Create recipe to save.
Image pipelines
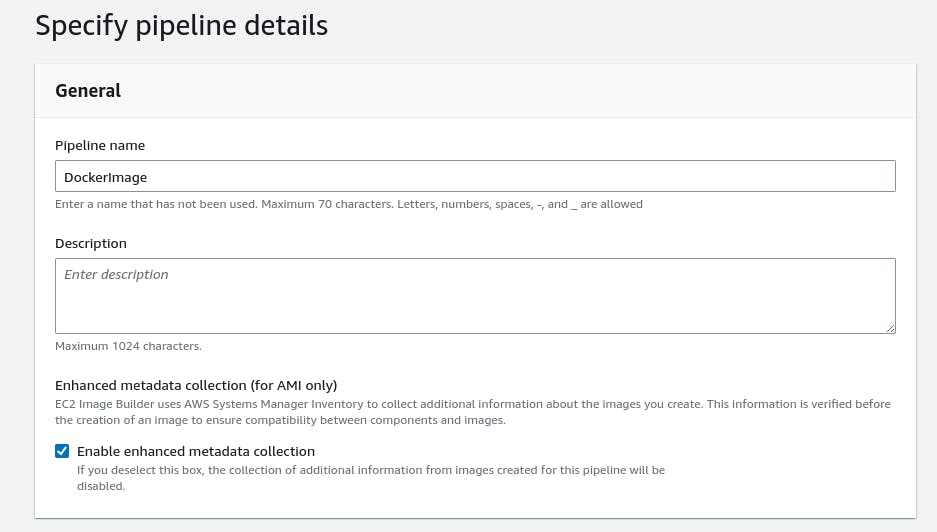
From the image builder console, click on Image pipelines and then Create image pipeline.
Specify a name for the pipeline:
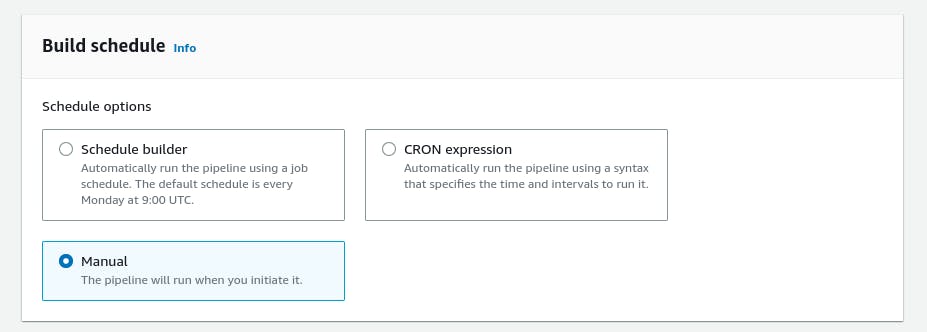
In the Build schedule section, select Manual and click Next.
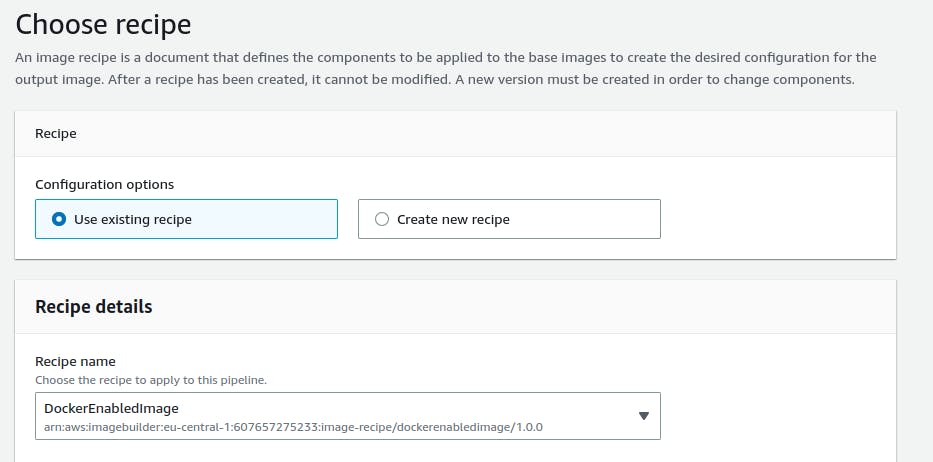
Select Use existing recipe and the image you previously created, and click Next.
The last two steps are optional just click Next, Next and finally Create pipeline.
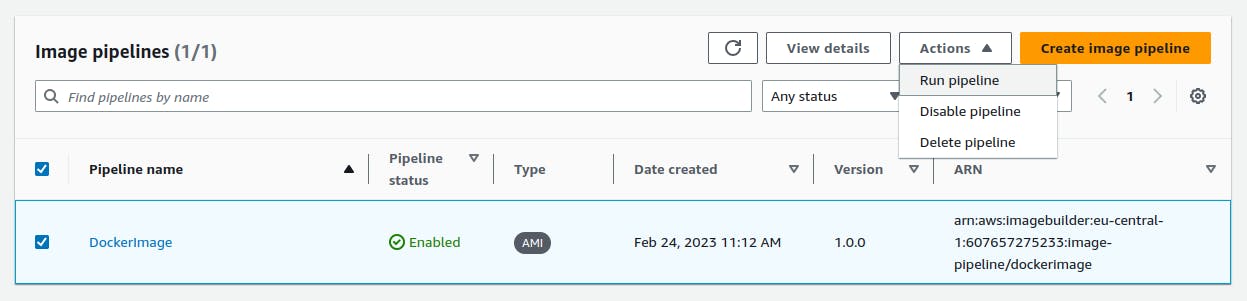
At this point, the pipeline is configured and has to be triggered manually to create an image. Select the pipeline and from the Actions drop-down menu click Run pipeline
The build process consists of spinning an EC2 instance, executing the recipe and saving the custom AMI. If you open the EC2 dashboard just after triggering the pipeline you will see the build process running:

The process might take some time, be patient!
Launch an Instance
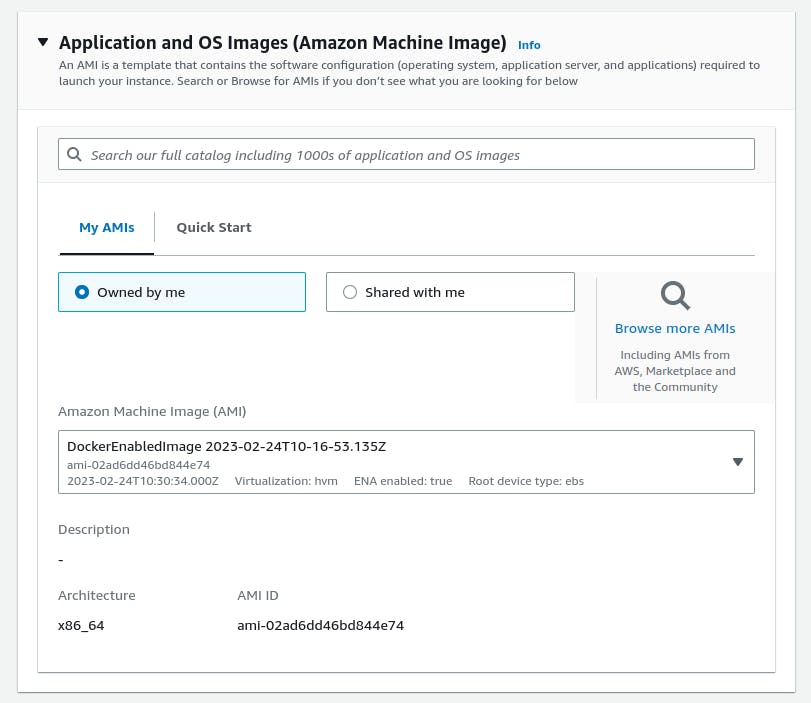
Go to the EC2 console and click Launch instances. In the Application and OS Images section select Owned by me and then the image created from the pipeline:
Click Launch instance.
You can check by yourself if Docker is running and the installed packages are present! ;)
Conclusions
We have learned how to use the AWS EC2 image builder to create custom AMI images. We also created a custom AMI with Docker ready to be used on EC2 instances without further configurations.
The Image builder is very convenient to automate software installations and also to trigger automatic image build whenever a component or the base image is updated.
Beware, the EC2 image builder is a regional service, if you create a recipe in an eu region will not be visible an us one.
While building the image, AWS selected the m5.large "Instance type" (as shown in the EC2 dashboard image). However, since a large amount of computing power is not required, I am curious if a smaller instance type could be used instead. Unfortunately, I have not been able to find a way to adjust the instance type during the build process.